What you need to sculpt a snail from plasticine
First of all, parents should purchase high-quality modeling material. It should be soft, pliable and not sticky, and no paint should remain on your hands during kneading. In addition, to make a plasticine craft in the shape of a snail, you need to prepare the following tools:
- Rolling pin. An empty cylindrical bottle will do. Flat elements are quite difficult to perform using only your fingers.
- Board or cardboard. Used as a work surface and stand.
- Wet wipe. Even high-quality material will leave marks on the child’s hands, as well as on the table; a napkin will allow you to quickly remove them.
When working, you may need a glass of warm water. You need to dip the block into it so that it softens and becomes more pliable. This is especially true when creating small details - antennae, eyes, patterns on the shell.
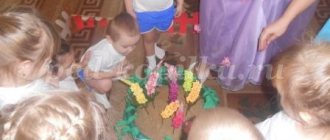
Part one. Introductory conversationThe teacher leads the children to a dry aquarium in which snails of the genus Achatina live.
- Do you know what these animals are called?
- Have you seen snails anywhere else? What do they have in common with snails living in an aquarium?
- What rhyme do you usually say when you find a snail? Can a snail fulfill the request of children who ask it to “stick out its horns”?
Part two. Snail observations
The teacher listens to the children's answers and comments, and then reports that the snail, unfortunately, cannot stick its horns out of its shell, despite promises of all kinds of goodies in the form of a pie. She can’t for two reasons: firstly, she doesn’t like pies, and secondly, she doesn’t have any horns. What are usually called snail horns are not actually horns at all, but eyes on stalks - very convenient. How do children behave to look around? They turn their head. The head turns due to the fact that it “sits” on the neck. But a snail doesn’t have a neck. But she has stems that she can rotate and look in all directions.
Then the teacher invites the children to take a better look at the snail, takes it out of the aquarium and places it on a piece of thick glass or plexiglass. If the room is warm enough, the snail will open. To stimulate her active behavior, you can rub the glass with a piece of cucumber.
Children watch a snail, and the teacher talks about the animal.
Scientists call snails mollusks. The Achatina snail is a gastropod: its “abdomen” is also a leg. How many legs do children have? The cat? The dog? But the snail mollusk has only one leg. But with its help, the snail moves quite deftly.
The teacher raises a piece of plexiglass with a snail up so that the children can observe the movements of the animal from below. In this position, it is good to observe the contractions of the muscular leg of the mollusk and the principle of its movement. While moving, the snail secretes mucus: mucus tracks are visible on the surface of the glass. Mucus is a kind of lubricant. In order for the engine in the car to work properly, the driver must pour oil into a special tank to lubricate the rubbing parts. The bicycle pedals are lubricated with oil so that they spin well. So the mollusk needs mucus-lubricant in order to protect itself from drying out, and its only leg from damage.
The teacher gives the children small pieces of bark and asks them to run their palm over them. How do children feel? Is it easy for your palm to glide over a rough surface? Difficult. You can also peel off the skin. And the mollusk has delicate skin.
Thanks to the protective layer of mucus, the snail is protected from the irritating effects of small grains of sand and rough tree bark. Even small thorns are not scary for her.
Sometimes the snail begins to collect pieces of cucumber from the surface. In this case, children can discover her mouth and watch her eat.
This snail eats plant matter. Her favorite delicacy is tender lettuce leaves. And in natural conditions it can eat the leaves of trees and shrubs. It would seem that to eat leaves, you need strong teeth. But the snail has no teeth. At least teeth like those of children. The snail scrapes the leaves using a special device - a grater. The grater, which grinds food, is located directly on the tongue.
Part three. Working with pictures
The teacher invites the children to look at several pictures and divide them into two groups: in some pictures the artist depicted the snail correctly - as it really is; in other pictures the snail is drawn with humorous errors (the snail is depicted with eyes on its head, a nose, a mouth and even teeth; the snail looks out from a shell house in which there is a window and a chimney).
What did the artist do wrong?
Children must find pictures with errors and explain why the image of a snail in the pictures is considered incorrect.
Part four. Sink house. Tactile acquaintance with a snail
The teacher draws the children's attention to the image of a snail shell in the form of a house with a pipe and a window.
What, in their opinion, is the difference between a sink and a house?
The shell really protects the snail from uninvited guests, and it can hide completely in it. There are some snails whose shells are even closed with special lids.
But, unlike a person, a snail cannot live in one house today and move to another tomorrow. The shell is an integral part of her body. A tiny newborn snail is born with a shell and does not change it throughout its life. The shell grows with the snail, and the snail grows with the shell. We can only see the outer part of the snail's body. Everything else is hidden in the sink.
Achatina snails have a spiral-shaped shell. And the part of the snail's body inside the shell is also twisted.
The teacher invites the children to carefully touch the snail shell: is it soft or hard? Warm or cold? Smooth or rough?
The shell is hard. In addition to its protective function, the shell plays the role of support. (For tactile exploration, you can also use a collection of shells of non-living mollusks. However, it would be correct if the teacher allows the children to carefully touch a living snail.)
Let the children feel themselves. They will easily discover that there are bones hidden inside them - many bones that make up the human skeleton. The main supporting axis of the skeleton is called the spine. But mollusks do not have such a spine. They are invertebrates. But they have a shell that serves them instead of bones.
Then the teacher takes out several snails from the aquarium and invites those who wish to carefully pick them up. How do snails behave? They hide in the sink. Why? Just in case the interference in their lives turns out to be hostile.
But children will not do anything bad to the snails: they simply bathe them to clear them of excess mucus.
You can first rinse the snails under running water from a tap or watering can, and then put them in a bath of warm water for a few minutes. Here the snails will “straighten up” and show that they like to swim. After this, the bought snails are placed back into the aquarium, and children are asked to wash their hands.
Part five. Imitation of snail movements
Children and their teacher move to the carpet. The teacher asks the children if any of them can show how a snail moves. Various options are being tried. It is debated whether this mode of movement corresponds to that used by the snail. It is very difficult to imitate the movements of a snail. To do this, you need to lie on the carpet on your stomach, press your arms tightly to your body, raise your upper body - i.e. turn into the “leg” of a mollusk - and try to depict a wave with your body.
It is easier to imitate the movements of a snail with your hand.
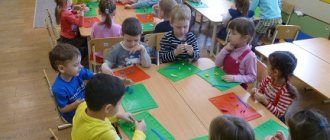
Part six. Drawing a snail
The teacher invites the children to sit at the tables and draw a snail.
Only one species of snail lives in the living area. And on the earth in its various corners there live many different mollusks. They vary in size, shell shape, and what they like to eat.
The most difficult thing is to draw the snail shell correctly.
The teacher can introduce children to techniques for depicting shells of various mollusks, but at the same time make a reservation: if the children come up with some other way, let them teach the teacher.
Then the children draw.
Finished drawings are strengthened at the exhibition. At the end of the lesson, you can invite the children to talk about their drawings: what they drew, why they depicted the snail this way, what the depicted animal is doing at the moment, etc.
If the teacher feels that the children are already tired, the discussion of the drawings can be postponed to the next lesson. This will serve as a convenient excuse to remember what was discussed during the first acquaintance with the snail.
Some notes on organizing classes from the “Getting to Know the Animal” series
- When conducting the “Getting to Know the Animals” series of lessons, it is useful to compare one animal to another. When making comparisons, you can use “joking” questions, for example: “What do the spines of a hedgehog and the shell of a turtle have in common?” When introducing a turtle, you can ask children to compare it with a snail: what do they have in common? A turtle, like a snail, wears its own “house”. And just like a snail, it performs protective and support functions. However, unlike a snail, for which the shell is the only support, the turtle also has bones inside. She is a vertebrate. You can ask children to answer the following question: “Slow people are often compared to a snail or a turtle: “Crawls like a snail” or “Crawls like a turtle.” Do these animals crawl the same way?” You can invite children to compare land and swamp turtles. Aquatic turtles, unlike land turtles, have webbed feet and feed differently: these turtles are predators.
- Just like the idea of a snail's "horns", there are many myths associated with animals that live in the wild. You can explain to children that they have no natural scientific basis. Thus, it is often believed that a hedgehog, in care of its offspring, pricks something on its needles - in particular, apples and mushrooms - and drags it into a hole. Firstly, hedgehogs are predators; they feed by hunting and do not eat mushrooms. Secondly, they do not make any reserves for the winter, since they hibernate during the cold season. Thirdly, if anyone has ever seen a hedgehog with something on its spines - for example, leaves - then this most likely happened by accident, by the will of the wind. As for apples, scientists make the following assumptions: hedgehogs can - extremely rarely - use wild apples in order to get rid of parasites due to the acid they contain.
- Although tactile familiarity with an animal is an important element of the lesson, some animals should not be given to children. So, a hamster or a marsh turtle can bite a child. It happens that some children are afraid to touch even harmless animals. In these cases, the teacher should not insist on contact during class. Perhaps after a while the child himself will want to pick up a snail or pet a guinea pig.
- After contact with animals, children must wash their hands.
How to make a snail from plasticine
Below are step-by-step master classes on creating a snail from plasticine of varying complexity. They are suitable for children from 3 years old.
A simple plasticine snail for children
The shell and body of the mollusk itself should be different in color. Both sharp contrast and slight differences in shades look beautiful. To create a simple product you will need the following materials and tools:
- material white, black and any two colors;
- wire;
- glasses with warm and cold water.
Step-by-step instructions on how to make a snail from plasticine:
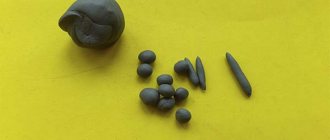
- Roll two balls from two bars of different colors. Next, each of them is lowered into a glass of warm water for 1 minute to make the material softer. One of the balls must be larger than the other.
- A large ball is rolled out into a long rope. This can be done in your hands in a canopy or with your palm on a board.
- Next, the tourniquet is rolled up in a spiral. This will be the snail's shell.
- A smaller ball is rolled into a thick short sausage and bent at a right angle.
- The base of the body is pressed against the board with your fingers so that it becomes flat and has uneven edges.
- The shell is placed on the flattened piece, pressing it slightly.
- Two pieces are plucked from the white block and then rolled into balls. They should be the size of beads. Next, a piece of black material is rolled out to form a plate. She needs to wrap the wire, which is then inserted into the prepared “beads” and into the body of the mollusk. Also, two small balls are made from black plasticine. They need to be crushed and placed on the beads. These will be the pupils of the snail.
Advice! The wire can be replaced with broken matches.
Snail made of plasticine and shells
This master class on creating a snail from plasticine will interest children 3-4 years old. To complete it, you need to take a walk in the park or walk around the outskirts of your summer cottage to find empty shells. Also for the craft you will need materials such as:
- long shells;
- multi-colored material;
- stack.
Step-by-step instruction:
- First you need to prepare the shells. They need to be washed well, cleaned of dirt, dust and mucus, and then dried. If desired, you can also varnish it.
- A block of colored material is kneaded in the hands and formed into a thick sausage. One of its ends is narrowed and the other is bent. The prepared shell is placed on top of the sausage.
- Oblong shells are washed and cleaned of dirt. The prepared parts are inserted into the head of the mollusk. The joint is smoothed out.
- Next, two balls the size of beads are formed from white plasticine. A recess is made inside them using a stack. A ball of green material is flattened and placed in place of the iris. The pupils are made in the same way. The finished eyes are placed on top of long shells.
- A short rope is rolled out of colored material. It is placed in the place of the smile.
Important! You should take hardening material if the craft will be used as decoration. A snail made from sculptural plasticine will look great as an interior decoration for a child’s room.
Plasticine snail on cardboard
A plasticine snail on cardboard is a beautiful composition, the creation of which requires only wire, a marker, stacks and the material itself. Instructions for making crafts:
- A block of purple material is kneaded and, turning in your hands, rolled into a long sausage.
- Next it is rolled up in a spiral. The excess part is cut off using a stack.
- A piece of pink plasticine is also rolled into a sausage. It should be shorter and thicker.
- The previously created shell is attached to the back, and the front is bent at a right angle.
- Using a marker, draw the snail's eyes.
- Next, the wire is cut to create two short pieces. A ball of colored material is threaded onto one end of each segment.
- After which the ball is pulled down. The other end of the wire is stuck into the head of the mollusk. These will be antennae.
- At the final stage, simple flowers with a leaf are created and placed around the snail.