Lesson summary for sculpting “Hedgehog”
Middle group.
Target:
Strengthen the ability of children to roll a ball of plasticine between their palms and pull out the plasticine with two fingers to give the work a characteristic image, add details (ears, eyes), teach them to convey the image of a hedgehog using seeds, consolidate the ability to listen to the teacher and act on his instructions, develop imagination and creativity children, develop emotional responsiveness and figurative speech, cultivate a sense of mutual assistance and love for nature.
Materials:
Basket, rubber hedgehog toy, modeling boards, plasticine, sunflower seeds.
Progress of the lesson:
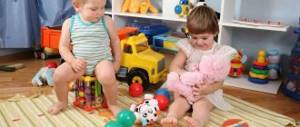
The teacher brings into the group a small basket covered with a scarf.
Q. Guys, an unusual guest came to our group. To find out who it is you need to guess the riddle:
There was a pillow with needles lying under the
Christmas trees. She lay there, lay there, and then ran.
Q. Who is this?
Children: Hedgehog!
V. That's right, hedgehog.
V. Raises the handkerchief and takes out the hedgehog. This is a hedgehog. His name is Erofey
. Let's look at a hedgehog. What does he look like? True to the ball. Just not a simple ball, but with needles. How do you think. Why do hedgehogs need needles?
D. The hedgehog defends himself from enemies.
Q. Correctly, a hedgehog needs needles to protect itself from enemies. What else does our hedgehog have?
D. Eyes, nose, ears.
V. Guys, look, our hedgehog Erofey
sad. He wants to tell me something in confidence. And do you know what he told me? He has no friends at all in the forest. Let's make hedgehogs from plasticine, and then the forest fairy will bring them to life.
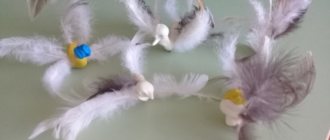
In order to make a hedgehog, we roll a ball out of plasticine, then use three fingers to draw out the muzzle. And in order for no one to offend our hedgehog, he needs thorns. We will make spines from seeds, we insert the seeds into plasticine with a sharp end, the more spines, the better it will be for our hedgehog. Now let's add some eyes and a nose. This is how beautiful our hedgehog turned out!
And now you and I will play a little.
B. Now our fingers are ready to help the hedgehog.
Independent work of children. Individual assistance.
Q. What wonderful hedgehogs you made. Now Erofey
will go and meet them.
B. With a hedgehog, he approaches each child and asks what his hedgehog’s name is. So Erofey
met his friends. First, the hedgehogs will go to an exhibition, and then they will go to the forest, where the forest fairy will turn them into living hedgehogs.
And now we will play with our hedgehog.
Erofey the hedgehog woke up
Stretch your hands up..
Stretched and smiled.
He raises his paws up, raises his arms up through the sides,
and then lowers them,
lowers them down.
And once again he raises them, And again he lowers them.
Abstract of the educational activity “Here is a hedgehog - no head, no legs” (modeling) Purpose: to teach children to sculpt a hedgehog, conveying the characteristic features of its appearance, to experiment with art materials to depict a prickly “fur coat”. Cultivate confidence and initiative in visual arts.
Organizational moment: All the children have gathered in a circle. I am your friend, and you are my friend. Let’s hold hands together and smile at each other.
Progress of the lesson. Educator. Guys, an unusual guest came to our group. And to find out who it is, you need to guess the riddle: There are needles on the back, Long and prickly. And he curls up into a ball - There is no head, no legs. (Hedgehog) Teacher. Who is this? Children: Hedgehog! Educator. That's right, Hedgehog. Let's look at the Hedgehog. What does he look like? True to the ball. Just not a simple ball, but with needles. How do you think. Why do hedgehogs need needles? Children. Hedgehog defends himself from enemies. Educator. That's right, its needles are very sharp, they help the hedgehog escape from enemies - wolves, foxes. What else does our hedgehog have? Children. Eyes, nose, ears.
The hedgehog is prickly, but not angry! Just a hedgehog's clothes made of needles, finely sewn by masters, so that on occasion he could hide his legs and curl up into a round ball on a forest path. These are the clothes so that they don’t touch the hedgehog.
Educator. Guys, look, our Hedgehog is sad. He wants to tell me something in confidence. And do you know what he told me? He has no friends at all in the forest. Let's make hedgehogs from plasticine. And so that our Hedgehog will not be sad anymore. 1. Take a lump of plasticine, roll out the ball and turn it into an egg - narrower in front, wider in back, then using three fingers we stretch out the muzzle. 2. We stretch out and sharpen the nose, slightly lift it up, as if a hedgehog is sniffing where the mushrooms grow.
Physical exercise A hedgehog stomped along the path And carried a mushroom on his back (walking in place) The hedgehog stomped slowly, Quietly rustling with leaves (rustling with his palms), And a bunny, a long-eared hopper, was jumping towards the meeting. In someone's garden, I cleverly got hold of a slanted carrot. (jumping like bunnies) 3. And in order for no one to offend our hedgehog, he needs thorns. We decorate the hedgehog’s prickly fur coat - we stick “needles” into the back, choose the material for the needles as you wish - seeds, matches. If we take seeds, then we insert the seeds into the plasticine with the sharp end, the more spines, the better it will be for our hedgehog. 4. We decorate the muzzle - attach the eyes, the nose - small balls of plasticine. This is how beautiful our hedgehog turned out! Educator. What wonderful hedgehogs you have made. Now Hedgehog will go and meet them. The teacher with the hedgehog approaches each child and asks what his hedgehog’s name is. Educator. So Hedgehog met his friends. First, the hedgehogs will go to the exhibition, and then they will go with the Hedgehog into the forest.
The outline of the proposed lesson was conducted with children of the preparatory group of a special correctional boarding school for children with disabilities of the VIII type. To complete even the simplest crafts, it is necessary to stimulate children to arouse in them some interest in the activity. And then, having spoken and repeated the instructions repeatedly, you can begin to implement them, making sure that interest does not wane until the end of the work.
How to make a hedgehog step by step:
Here is a set of colorful blocks. Naturally, children's fingers will immediately be drawn to some bright colors. Kids love yellow, green, and blue shades. If you really want, you can make the hedgehog rainbow, fantastic, and simply wonderful. We will show the modeling in calm shades that suit the theme of the craft.
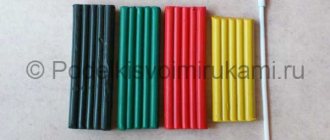
Take a gray block from a plasticine kit or create it yourself if there is no ready-made shade. Tear small portions from a piece and roll out into balls. Then press it onto the board with your finger and roll it into sausages.
Stick a large number of thin gray needle sausages. Set them aside for now. In the future we will cover the entire back of the hedgehog with them. They need to cool and harden a little before further work.
Roll into an orange or brown ball.
Press the ball down on all sides to create an oblong body of a hedgehog. And sharpen one side to highlight the animal’s small nose. Glue the nose and mustache.
From plasticine of the same color as the body, make four small legs. Shape them into triangular spatulas, showing each finger.
Glue small eyes. And also start attaching the thin gray needles obtained earlier. It is better to move from back to front, but this work is painstaking and intricate.
Glue all the thorns on the back, right up to the head. Do not press down the plasticine on top with your palm, at least until you freeze the product in the refrigerator.
The prickly plasticine hedgehog that looks like a real one is ready.
Of course, the most difficult and lengthy stage is creating the needles and attaching them to the back. We have shown a completely plasticine figure here, but you can come up with your own version of the prickly covering.
Did you like the craft idea?
We will be grateful for any financial assistance for the preparation of new master classes.
Goals:
Continue teaching children how to make a product with several parts. Strengthen the techniques of circular rolling, connecting parts, drawing lines in a stack. Teach children to create a finished image using natural and waste materials. Introduce children to the cactus plant.
Introduce Natalia Shaibakova’s poem “Cactus”. Consolidate knowledge about size (more or less). Develop curiosity, fine and gross motor skills.
Equipment:
Pictures depicting various cacti. Living plant in a pot. Green and black plasticine, stacks, modeling boards, plastic lids, chopped and dried pine needles, flowers from a fruit tree. Green hoops, red paper flowers.
Preliminary work:
Children use felt-tip pens to paint the plastic lids with vertical lines to decorate a cactus pot.
Progress of the lesson
Today we have a guest. This is the plant about which they say:
He looks like a hedgehog, only his roots have grown into the ground. No ears, no legs, no eyes, But on the other hand, the thorns are great! It grows very slowly and does not bloom every year. It has a red flower, How beautiful is the blooming one... (Cactus)
This plant is called a cactus. Look what an unusual plant this is. Instead of leaves it has thorns. What can you say about a cactus? What is he like? Green, prickly, beautiful.
There are small cacti the size of a fingernail, and there are giant cacti - taller than the building of our kindergarten. Cacti are not afraid of heat. They are watery inside. Even the smallest cacti have large roots. Different cacti have different spines: hard and soft, long and short, and there are even cacti with poisonous needles. In ancient times, people plucked the spines of large cacti and used them as needles. Many cacti are edible. They make compotes, jam and are simply eaten raw. Some cacti can eat small insects. Their bright, red flowers, smelling of meat, attract insects. A midge flies up to the scent, lands on a flower, and it goes bang, closes, and swallows the fly.
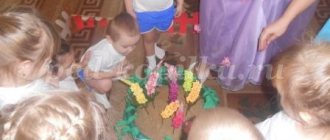
Let's play a game about cacti that eat insects.
Dynamic pause “Cacti and insects”
Hoops are cacti. Some cacti with red flowers. It is these cactus hoops that insects flock to. And you will be the insects. One, two, three, four, five, let's start playing! Children, turn into insects and fly to the cacti.
The teacher makes sure that the children gather only in those hoops where the red flower lies. You can invite the children to “chew.”
He always lives in the desert, and there is no water there. When watering a cactus, do not ruin it - The cactus needs very little water.
When caring for a cactus, you need to be careful not to touch its spines. The thorns can hurt and dig into your palm. This happened with one child from Natalia Shaibakova’s poem “Cactus”.
Reading the poem "Cactus"
Mom's cactus on the window haunts me. I'm spinning around him, I don't take it, in case I inject myself. I remember my mother’s words: “It’s prickly. You can’t take it!” But I can’t bear it anymore - my finger hit a cactus! “Ahhh,” I let out a strong roar. “I haven’t found the words yet.” But now I know for sure - I don’t play with the cactus!
Modeling “Blooming cactus in a beautiful pot”
Take the plastic caps in your hands. You have already made them beautiful and turned them into pots for indoor plants.
To plant a plant in a pot, first of all you need to fill the pot with soil - earth. To do this, take black plasticine and fill the lid of the pot with it.
Now let's get to the cactus. Divide the green plasticine into two unequal parts - one part should be large and the other part should be small. Take a larger piece of plasticine and roll it into a ball, then roll it lightly between your palms to create an oval shape. Now “plant” the cactus in a pot of soil - place and lightly press the green plasticine onto the black one. From a small piece of green plasticine we will make a shoot for the cactus: roll out the ball in a circular motion with our palms and attach it to the large cactus.
Now take the stacks and apply stripes with them on the cactus from top to bottom.
What are our cacti missing? There are not enough thorns. Stick needles into green plasticine and the cactus will have spines.
What beautiful cacti you have! Indistinguishable from the real thing! And, although cacti bloom very rarely, today they just bloomed - stick a flower into your cacti.
You can take your beautiful cacti home. Show them to your family and friends and be sure to tell them everything you learned today about this amazing plant.
Summary of a modeling lesson in the middle group “Forest hedgehog”
Lesson summary for visual arts, modeling “Forest Hedgehog”.
Goal: 1. To develop children's interest in working with plasticine 2. To continue to strengthen the skills of rolling, pinching and squeezing.
3. Mastery of the action of detailing. 4. Promote the development of the use of plasticine in conjunction with natural materials. Preparation for the lesson: Homework on the eve of the modeling lesson - watching the cartoon “How the Hedgehog and the Little Bear Celebrated the New Year” at home with parents, 1975.
Materials for the lesson: Plasticine, modeling board, stacks, sunflower seeds, paper napkins. Riddles about a hedgehog.
Progress of the lesson: Educator: Hello guys! I have a question for you - has everyone watched the cartoon at home “How the Hedgehog and the Little Bear Celebrated the New Year”? Children: Yes. Educator: Who was the main character of this cartoon? Children: Hedgehog! Educator: And what was the hedgehog doing there? Children: He was a Christmas tree for the bear cub! Educator: Do you remember what the bear cub decorated the hedgehog with? Children: Yes, the bear cub decorated the hedgehog with mushrooms and apples! Educator: That's right, well done! How many of you have seen a real hedgehog? Children: Various answers from children.
Educator: What do you think the hedgehog eats? And in order to find out exactly what the hedgehog eats, I suggest you guess a few riddles: He walks in the forest without a bag, apples, mushrooms, needles on his back. Who's that at the Christmas tree? Children: Hedgehog!
A very interesting modeling activity for children: Summary of a lesson in the middle group on modeling from salt dough in kindergarten “Magic balls, sausages”
Educator: Correct! What's on his back?
Children: Apples and mushrooms! Educator: Correct! Here's another riddle:
On an autumn day, on a beautiful day, I walked along a forest path like a prickly ball and found an apple in a clearing. And I’ll tell you, I really like apples... Children: Hedgehog!
Educator: Okay, you answered correctly! And you probably guessed that today we will sculpt a hedgehog.
Educator: (demonstration) to begin with, we take a piece of black plasticine and roll it out into a thick sausage, then we sharpen it on one side and now we practically have the face of our hedgehog. Next, take three small pieces of brown plasticine and roll small balls. These will be the eyes and nose of our hedgehog. Guys, what do you think we have sunflower seeds for? We will make him unusual needles from plasticine and from sunflower seeds! Take one seed at a time and carefully insert it into the back of the hedgehog. Remember when we solved riddles about what a hedgehog eats?
Children: Children's answers.
Educator: That's right, the hedgehog loves to eat apples. We will also make apples for your hedgehog. Let's take small pieces of napkins, crumple them in our hands and roll them into a ball, which we will put on the back of our hedgehog!
Independent activity of children. Perform a task according to a sample or from memory. If necessary, turn to the teacher for help. Educator: Guys, you are so great! Everyone turned out to have very beautiful hedgehogs with delicious apples!
Nomination: Kindergarten, Lesson notes, GCD, modeling, applique Title: Lesson notes on modeling in the middle group “Forest hedgehog” Author: Korneva Ekaterina Sergeevna Position: teacher Place of work: MBDOU No. 22 Location: Krasnoyarsk
How to make a hedgehog from plasticine
If your child likes to create animal figures from plasticine, invite him to make a hedgehog. This cute, prickly animal will add to your baby's collection of products. To make a little animal, we suggest you choose one of the instructions below. You will learn how to make a hedgehog from plasticine in different ways.
If you have already sculpted a cat from plasticine, which we talked about in the previous article, then making a charming hedgehog will not be difficult. We have selected several options for making a hedgehog for you. The first two will be based only on the use of plasticine.