Kulumbegova Anna
Experiments with sand in the middle group
Experiments with sand
Target:
1. Help children better understand the inanimate world around them;
2. Create favorable conditions for sensory perception, improving such vital mental processes as sensations, which are the first steps in understanding the world around us.
3. Through games and experiments, teach children to determine the physical properties of sand .
4. Teach children to make independent conclusions based on the results of the examination.
5. Nurture the moral and spiritual qualities of a child during his communication with nature.
Experiments with sand:
№1 "Where does sand come from"
Material: stones, sheets of white paper, magnifying glass.
Progress of the experiment:
Take 2 stones and knock them against each other, rub them over a sheet of paper.
• How do you think it flows?
• Take your magnifying glasses and look at it.
• How did we get sand?
• How does sand appear in nature?
Conclusion: Wind and water destroy stones, as a result of which sand appears.
№2 “What is sand made of?”
Materials: cups of sand , sheets of white paper, magnifying glasses.
Card index of experiments with water, air, sand
Equipment: objects that make sounds, screen
- the child behind the screen selects an object with which he then makes a sound, the other children guess. They name the object that produced the sound and say that they heard it with their ears.
Various objects Screen Ear – organ of hearing
Human
Goal: determine which sense organ works? Learn to identify different foods by smell.
Equipment: screen with slots for the nose, Kinder Surprise cases with holes, aromatics, garlic.
- the children put their noses to the window of the screen, and the teacher asks them to guess by smell what is in their hands. What is this? How did you find out? (The nose helped us.)
Garlic in a box Incense sticks Nose – the organ of smell
Human
Goal: determine which sense organ works? Guess the taste?
Equipment: fruits, sugar, salt
- The teacher asks the children to guess the taste of lemon and sugar. How did you determine? (using tongue)
Fruit bowl Salt and sugar Mouth – organ of taste
Light
Goal: to study the nature of light, light is everywhere.
About equipment: illustrations of events occurring at different times of the day; pictures with images of light sources; several objects that do not provide light; flashlight, candle, table lamp, chest with a slot.
Grandfather Know invites children to determine whether it is dark or light now and explain their answer. What's shining now? (The sun.) What else can illuminate objects when it is dark in nature? (Moon, fire.) Invites children to find out what is in the “magic chest” (a flashlight inside). The children look through the slot and note that it is dark and nothing can be seen. How can I make the box lighter? (Open the chest, then light will come in and illuminate everything inside it.) Open the chest, light will come in, and everyone will see a flashlight. And if we don’t open the chest, how can we make it light? He lights a flashlight and puts it in the chest. Children look at the light through the slot. • The game “Light can be different” - grandfather Znay invites children to sort the pictures into two groups: light in nature, artificial light - made by people. What shines brighter - a candle, a flashlight, a table lamp? Demonstrate the action of these objects, compare, arrange pictures depicting these objects in the same sequence. What shines brighter - the sun, the moon, a fire? Compare the pictures and sort them according to the brightness of the light (from the brightest).
Light
Goal: to introduce children to the features of light and shadow
Equipment: shadow theater equipment, lantern.
The teacher asks him: “What is this? What is a flashlight for? "Misha offers to play with him. The lights turn off and the room goes dark. Children, with the help of a teacher, shine a flashlight and look at different objects. Why do we see everything clearly when a flashlight is shining? What do we see on the wall? (Shadow.) Offers the children to do the same. Why is a shadow formed? (The hand interferes with the light and does not allow it to reach the wall.) The teacher suggests using the hand to show the shadow of a bunny or dog. Children repeat. Game "Shadow Theater". The teacher takes out a shadow theater from the box. Children examine equipment for a shadow theater. What is unusual about this theater? Why are all the figures black? What is a flashlight for? Why is this theater called shadow theater? How is a shadow formed? Children look at animal figures and show their shadows.
Progress of the experiment:
Pour sand onto a piece of paper and examine it with a magnifying glass.
• What is sand made of? (grains – grains of sand)
• What do grains of sand look like?
• Are the grains of sand similar to each other?
To get a large pile of sand you need a lot of sand .
Conclusion: Sand consists of small grains of sand that do not stick to each other.
№3 “Does sand fall easily?”
Material: trays with sand .
Experiments with sand and clay /as part of innovation activities/
EXPERIMENTS WITH SAND
Experience No. 1
Target:
introduce children to the property of sand - flowability.
Equipment:
sand (clean), large tray, magnifying glass, sheets of paper.
Progress:
Pour clean sand into a large tray. Set a cognitive task for the children: “Look carefully at the sand and find as many features as possible in the grains of sand.” Together with the children, look at the grains of sand through a magnifying glass. The grains of sand are not the same in size (large, small), in color (dark, light), in degree of shine (some grains of sand are shiny, others are matte), there are transparent and opaque grains of sand. Bring the children to the conclusion that the sand is free-flowing: the grains of sand are not fastened together, they scatter on a sheet of paper.
Conclusion:
sand has the property of flowability.
Experience No. 2
Target:
introduce children to the properties of wet sand (wet sand is heavier than dry sand)
Equipment:
small buckets filled with dry sand, a glass of water.
Progress:
children compare sand in buckets (by weight, by color). Add a glass of water to one bucket of sand (water the sand). The wet sand became heavier. Why? The weight of water from the glass was added to the weight of dry sand.
Conclusion
: Wet sand is heavier than dry sand.
Experience No. 3
Target:
changes in the properties of sand depending on its humidity.
Equipment:
wet sand, dry sand.
Move
: wet sand does not flow into the palm of your hand, but it can take any shape until it dries. Explain why figures can be made from wet sand: when the sand gets wet, the air between the edges of each grain of sand disappears, the wet grains of sand stick together and hold each other. Invite children to make simple figures from wet sand. Compare the color of dry and wet sand.
Conclusion:
Wet sand is darker than dry sand, does not have the property of flowing, and figures can be sculpted from wet sand.
Experience No. 4
Target:
Show children the permeability of water and the waterproofness of clay.
Equipment:
2 jars: one with water, the other with clay, a vessel with water.
Progress:
Pour the same amount of water into the jars. Water passes through sand immediately and does not pass through clay.
Conclusion:
sand is permeable to water (the grains of sand are not fastened to each other, so water easily passes through them); clay has the property of not allowing water to pass through (the main feature of clay is that its particles are connected, fastened together, so water does not pass through them).
EXPERIMENTS WITH CLAY
Experience No. 1
Target:
introduce children to such a property of clay as fragility.
Equipment:
dry clay, wooden plank, hammer.
Progress:
put the clay on the board. Break the clay into pieces with a hammer. Invite the children to use their hands to break the pieces of crushed clay into even smaller pieces.
Conclusion:
dry clay breaks easily because it is brittle.
Experience No. 2
Target:
Show children the difference between wet clay and dry clay.
Equipment: dry clay, vessel with water.
Progress:
Place one of the pieces of clay in a vessel with water. Compare dry clay and clay in water.
Conclusion
: dry clay is brittle, light in color; raw clay is viscous, plastic (you can sculpt something from it, because its particles are connected to each other), the color of wet clay is darker than that of dry clay.
Experience No. 3
Target
: introduce children to the special property of clay - it does not allow water to pass through.
Equipment:
wet clay, vessel with water.
Progress:
Invite children to make a glass, cup, or bowl from clay. Then pour water into the resulting pottery. Water is held in a vessel.
Conclusion
: clay particles are tightly bonded to each other, so water does not pass through them.
Experience No. 4
Target:
Show children that they can draw on baked (or dried) clay.
Equipment:
various clay figurines (not painted), a sample of the finished figurine, paints, brushes, glasses of water.
Progress:
show that a clay figurine can be painted with paints. Draw children's attention to the fact that paint adheres well to baked clay, invite children to paint clay figurines, showing a sample.
Conclusion:
baked clay can be painted with paints to make the clay product look more beautiful.
Experience No. 5
Target:
identify the properties of clay (wet, soft, viscous, you can change its shape, divide it into parts, sculpt); and stone (dry, hard, it cannot be sculpted from it, it cannot be divided into parts).
Equipment:
boards for modeling, clay, river stone, model for examining the object.
Progress:
According to the model of examining an object (Fig. 4), grandfather Znay invites children to find out whether it is possible to change the shape of the proposed natural materials.
To do this, he invites the children to press their finger on the clay or stone. Where is the finger hole left?
What stone? (Dry, hard.)
What kind of clay?
(Wet, soft, holes remain.) Children take turns taking the stone in their hands: crushing it, rolling it in their palms, pulling it in different directions.
Has the stone changed shape? Why can't you break off a piece of it?
(The stone is hard, you cannot mold anything from it with your hands, it cannot be divided into parts.) Children take turns crushing the clay, pulling in different directions, dividing it into parts.
What is the difference between clay and stone?
(Clay is not like stone, it is soft, it can be divided into pieces, clay changes shape, it can be sculpted from it.)
Children sculpt various figures from clay. Why
don't the figures fall apart?
(Clay is viscous and retains its shape.)
What other material is similar to clay?
Summary of educational activities with children of the preparatory group “Meeting with Dunno. Experiments with clay and sand"
Link to the article, when indicated in the bibliography (according to GOST R 7.0.5–2008):
Maksimenkova O.S. Summary of educational activities with children of the preparatory group “Meeting with Dunno. Experiments with clay and sand" // Sovushka. 2020. N4(10). URL: https://kssovushka.ru/zhurnal/10/ (date of access: 10.10.2020).
Order No. 42375
Target:
Introduce children to the characteristics of clay and sand, their properties, and compare how they differ.
Tasks:
- Continue teaching children to work using mnemonic tables.
- Develop ecological thinking in the process of conducting elementary experiments.
- To instill in children the ability to help comrades and everyone who needs it.
- Encourage children to work independently using diagrams at the end of the lesson.
Equipment: Samples of sand and clay in cups, cups of water, sheets of paper, sticks, magnifying glasses, boards, napkins, wet clay in plates, mnemonic tables.
GCD move
(The group is decorated in the shape of a forest, there is a path in the forest, children with a teacher walk along the path and meet Dunno).
- Oh, hello, are you guys going out too? So I decided to take a walk and get some fresh air. So great! Flowers, leaves. I walked and walked, suddenly the wind rose, even I almost flew away. The wind was so strong and caused so much damage.
Educator:
- Guys, let's see together with Dunno what the wind brought.
(Dunno takes sand, clay and asks)
- What it is? I don't know.
- This is sand and clay.
— Tell me the difference between sand and clay, what they are like.
Educator:
“Guys, let’s all go together and invite Dunno to our mini-laboratory and help us find out with the help of experiments.”
Experience No. 1
- Take a cup of sand and carefully pour some sand onto a piece of paper.
— Does sand fall easily? (children's answer)
Now let's try to pour clay out of the glass.
—Which is easier to pour out, sand or clay? (children's answer)
“That’s why they say that sand is “free-flowing.” The clay sticks together in lumps and cannot be poured out of a cup as easily as sand.
Conclusion: Sand is free-flowing, unlike clay.
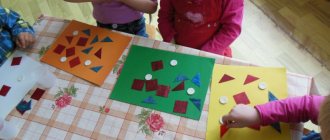
Now take cards on which loose sand and lumpy clay are indicated, attach them to the board.
Experience No. 2
- Using a magnifying glass, carefully examine what the sand consists of (from grains - grains of sand).
— What grains of sand look like (they are very small and round).
-Are grains of sand similar to each other? How are they similar and how are they different? (children's answer).
Then we will study a piece of clay in the same way.
— Are the same particles visible in the clay? (children's answer)
— In the sand, each grain of sand lies separately, it does not stick to its “neighbors.” And in clay, very small particles stick together.
Conclusion: Sand consists of grains of sand that do not stick to each other, clay is made of small particles that seem to be held tightly by hands and pressed against each other.
-Find cards that indicate sand consists of grains of sand, and clay consists of small particles pressed against each other and attach them to the board.
Experience No. 3
-Take a stick and try to “plant” it in turn in a glass with sand and clay. Let's imagine that we are planting a small tree.
-Which is easier to put her in? (children's answer)
Conclusion: It is easier to stick a stick into sand than into clay, because it is loose, but clay is not.
-Now find pictures that indicate loose sand and dry clay and attach them to the board.
Experience No. 4
— Let’s make bagels from wet clay for Dunno. Then try to make the same bagels from wet sand.
-What happened? (children's answer)
— What can be made from wet sand? (children's answer)
Conclusion: Clay molds well, but sand does not.
- Guys, let’s remind Dunno what properties sand and clay have (children’s answer).
Dunno:
- Thank you guys, you told me everything and showed me everything. Now I have learned a lot about sand and clay, how they differ from each other. I really liked your place. Can I come to you again? (children's answer)
And I have prepared gifts for you, help yourself, children.