Needlework
05.26.2018 Anastasia Prozheva
All parents and kindergarten teachers know how important it is to teach children the rules of the road. And children do not always readily assimilate the information presented to them, striving to cross the road outside the pedestrian crossing zone or at a red traffic light. And since children love to play and create entertaining crafts with their own hands, it is easiest to convey the necessary information to them in a creative playful form. An interesting application will help with this - a traffic light made of paper. After all, in the process of making it, you can not only keep kids busy with an exciting activity, but also teach them how to cross the road correctly, paying attention to the traffic lights.
In addition, appliqué activities help develop children’s creative thinking and fine motor skills. There is an opinion that it even helps to increase intellectual abilities.
For any age of preschool children, you can develop your own models of traffic lights, increasing the level of complexity and intricacy in accordance with the age of the kids. You can make such crafts both at home and in kindergarten, or in elementary school during creative lessons.
For the little ones
The materials for such a traffic light will be the simplest, depending on what you plan to make the traffic light from. It could be simple paper, yellow, red and green leaves of trees from the park, pieces of colored fabrics. Tools can also be thread and a needle, glue, cardboard, leather, etc.
We will be making paper appliqué for children in junior kindergarten groups, therefore, we will need the following items:
- a piece of cardboard;
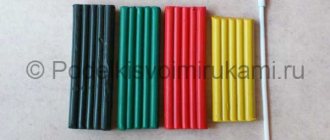
- colored paper - green, yellow, red and black;
- glue.
For kids, it’s better to prepare in advance a template for the shape of the traffic light itself and the circles for its lights, so that it won’t be difficult for the children in the process of making the craft and the result will be exactly the option we had in mind.
The technique for performing such a craft is as simple as it sounds. You can simply stick the colored circles in the desired sequence onto the prepared cardboard. You can complicate the task slightly and cover a cardboard rectangle with black paper and attach circles on top of it to make the craft more realistic.
Related article: Knitted top with knitting patterns and description: how to knit with photos and videos
DIY traffic light for kindergarten
Master Class. My friend is a traffic light
The child constantly learns about the world around him, thereby accumulating and enriching his life experience.
Designing paper of various types and textures will allow preschoolers to consolidate their knowledge of geometric shapes, the ability to arrange them and navigate in space. Using adhesive paper in working with children, we develop fine motor skills, patience, perseverance, and the desire to achieve a goal. Finally, by cutting, measuring, and drawing, the child trains his hand, strengthens his muscles, and develops skills that will definitely come in handy while studying at school. I bring to your attention a master class “My friend is a traffic light”
, the main objectives of which are: - to expand children’s knowledge about traffic rules and safe behavior on city streets; — enrich vocabulary; - develop memory, thinking, creativity; - consolidate knowledge about geometric shapes, color, ordinal counting. The master class is designed to work with middle-aged children. The craft can be used as an attribute in the role-playing game “Road”, the board and printed game “Road Safety”, as visual and didactic material on traffic rules. Required material: - black cardboard; - adhesive paper in yellow, green and red colors; - scissors; - ruler; - a simple pencil; - PVA glue or double-sided tape.
Using a ruler, divide a sheet of black cardboard into two equal parts (lengthwise); draw a straight line using a simple pencil; Cut it carefully using scissors. In the process of performing this operation, the child develops an eye.
On red adhesive paper, measure a 7x7cm square, draw it in squares, and carefully cut it out. While performing this exercise, you can ask your child several questions, the main purpose of which is sensory education: What is the name of a geometric figure? What color is it? What size is it? How many of these figures did you make?
We cut out a square of yellow paper in the same way.
At the same time, you can ask your child a riddle: At the crossing strip, On the side of the road, A three-eyed, one-legged beast, Breed unknown to us, Talking to us with multi-colored eyes.
The red eye looks at us: “Stop!” says his order. The yellow eye looks at us: - Be careful! Stop now! And the green one: - Well, go ahead, pedestrian, to the crossing! This is how the silent one conducts his conversation... (Traffic light)
We continue our work and proceed to the green square: carefully and carefully measure, draw, cut out.
While performing this work, you can read a poem, thereby instilling in the child artistic taste, the ability to imagine and fantasize; establish rules for safe behavior on the road. The traffic light has three windows. When crossing, look at them! If the red light is on in the window, “Stay on the panel,” he says. If suddenly a yellow window flashes, you still have to wait a little longer. If the green light is on in the window, it is clear that the path is open for pedestrians. The traffic light understands everything without words: It speaks in the language of lights. S. Mikhalkov
The next step is to cut off the corners of squares of different colors to create circles.
To continue working, you can do finger exercises, while your hands will rest, thereby increasing the child’s performance and interest in the activity. There are a lot of road rules: One - Attention, road! Two - Traffic lights, Three - Look at the road sign, And four - Crossing. You need to know all the rules and always follow them.
We remove the protective layer of paper and glue our multi-colored circles to the rectangle in the correct sequence. To ensure that your child does not have any difficulties in completing this task, you can first go on an excursion to the traffic lights, look at the illustrations, and play printed board games, the main purpose of which is to reinforce the rules of the road.
Our friend Traffic Light is ready. Follow the traffic rules and be healthy!
We recommend watching:
DIY paper boat. Master class with photo DIY traffic light for children. Master class with step-by-step photos Summary of a game lesson on traffic rules in the middle group Do-it-yourself traffic light from disks. Master class with photos
Similar articles:
DIY traffic light made of paper and cardboard
Scenario of a morning performance on traffic rules in the preparatory group
Traffic rules holiday in the preparatory group
Working with parents on traffic rules in kindergarten
For middle preschool age
At the age of 4-5 years, children themselves can and want to cut out stencils from cardboard and colored paper. And here you can already show your imagination and do cut-out appliqué, which involves using small pieces of paper of the same size. Doing this type of appliqué develops spatial and creative thinking in children.
To make crafts using this technique, we will need pre-printed traffic light diagrams, glue and green, yellow and red colored paper.
If they have everything they need, all the children need to do is paste colored scraps of paper onto the prepared stencil in the correct sequence of colors.
Small details can either be prepared in advance or entrusted with this task to the kids. It depends on their preparation.
Traffic light with moving parts made of paper
A traffic light with moving parts is a very visual aid for learning traffic rules. On the inside of the craft there are three colors - red, yellow and green. Folded black cardboard is connected to black circles with a movable handle. With the help of a pen we can cover those colors that we do not need at the moment.
For example, a traffic light “shows” red.
Red color
And so the traffic light “shows” yellow.
Yellow
For older preschoolers
For children 6-7, it is better to complicate the task so that the kids themselves cut out shapes for traffic lights from the proposed stencils and draw facial expressions on them. To interest them more, you can offer to draw the faces of emoticons or emojis, which are so popular nowadays, on the craft mugs.
Traffic signals can be decorated with various elements. To highlight a lit signal, the rest can be shaded in the form of a hash mark. Or, conversely, you can emphasize the desired color by gluing or drawing rays around it.
At older preschool age, you can already safely create trimmed appliqués. The applique also has a wonderful combination with origami. Traffic signals will look original in the form of figures created using folded sheets of multi-colored paper.
This combines 2 types of craft making techniques and increases children’s interest. An example of such a product is a traffic light made from cats.
Unique crafts
Children of primary school and senior preschool age are already able to show their imagination and manual dexterity and create individual, unique crafts. In this case, you can use the following traffic light design techniques:
- quilling or twisting. This type of technique involves rolling up colorful strips of paper, in this case creating an original look for traffic signals. For many, this will seem difficult at first, but with the care and experience of a teacher or educator, any child can handle this technique.
Related article: How to sew a skirt with frills: pattern and sewing diagram for a full skirt
- trimming. Twisting also takes place here, but the work is more painstaking. Thin strips of colored paper are wound onto a pen shaft and then glued onto the template. You will need as many rolled paper strips as possible so that when gluing there are no gaps between them.
How to learn to “respect” traffic lights?
But you can’t have as many police officers as there are intersections on the roads in the country, so traffic lights are placed in these places.
And traffic controllers appear only in special cases. When it is necessary to block traffic for pedestrians, clearing the way for transport with children, ambulances, firefighters and other vehicles in emergency situations. Then both adults and children will expect the transition.
Parents need to teach their children to cross roads following traffic lights not before the first “September 1” in their children’s lives, but from the age of two or three. Explaining each time at intersections what each of the three traffic light colors means.
It’s even better to do this at home, making traffic lights from scrap materials together with your kids. And in game episodes, explaining to them how and when to cross the road.
In this case, children will not only learn this traffic rule, but will also learn handicrafts and, specifically, how to make a traffic light craft.
Children are not forced to complete such a craft, but are explained that they will better understand the meaning of all the light signals of this complex device on the road.