What you need for sculpting
As in previous lessons, we will first prepare a workplace: a table, oilcloth and plasticine. Cover the table with oilcloth. No matter how hard the child tries, at some point he will still want to roll the plasticine on the table. Therefore, you should not ignore modeling boards. It is worth protecting the baby’s sleeves from plasticine. If possible, put armbands on your baby.
If you have a mass for modeling, then you don’t need to worry about the plasticity of this material, but ordinary plasticine can be very dense. Therefore, we recommend warming up the plasticine a little. Just don’t put the pack on the battery!!!
Progress of the lesson
Show children object pictures with berries, asking them to name each berry. You can play with the guys the game “Which berry is missing?” Among the missing berries, hide the grapes last.
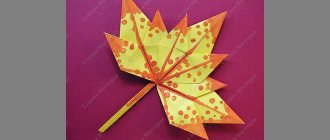
Then look at the grape sprig with the children. Notice how the oval berries are arranged on it, how beautiful the carved leaves are - they look like maple leaves, only smaller.
Offer to sculpt a sprig of grapes on cardboard. To do this, you need to roll up green sausages and place a branch out of them on cardboard; Roll a green ball, flatten it between your palms and cut out the outlines of a leaf using a stack. Attach the leaf to the cardboard. Tear off small pieces from light green or purple plasticine, roll them between your palms into ovals and attach them to a branch in rows: the first row is the longest (5-6 berries), the second is shorter, etc.
Lesson 2. Vegetables on a plate (Modeling from plasticine)
Program content.
Teach children to sculpt complex-shaped vegetables of different sizes from life, using finger sculpting to create indentations and narrowing of the shape characteristic of certain vegetables. Learn to select the desired color of plasticine and size of the craft while working. Strengthen the ability to sculpt a plate based on a plasticine ball. Develop fine motor skills.
Material.
Models of vegetables with complex shapes: eggplant, peppers, beets, turnips, etc. Plasticine, stacks, modeling boards (for each child).
Technology of modeling fruits from plasticine
Now let's start sculpting the fruit. Select plasticine blocks of the desired color. With older children (primary grades), you can sculpt the base from model plasticine, and then apply color.
Making an apple
Roll a ball out of plasticine. Squeeze it slightly and make a small indentation in the middle at the top. There will be an apple stalk there. Separately, sculpt a petiole from brown plasticine and a leaf from green. Make a stack of vein stripes on the leaf. Attach the leaf to the petiole. Stick the petiole in the recess of the apple. If children sculpt a base from model plasticine, then after sculpting the main shape, they need to apply color. To do this, we roll out thin sheets of colored plasticine and place them on the main form, carefully smearing and rubbing with our fingers so that the surface is even. We need to explain to the kids that apples come with a ruddy side, stripes, and spots. Let the kids get creative and make their own little apple.
Let's make a plum
You can make a plum using the same pattern. Please pay attention to the fact that the cream is smaller than the apples. You can make two creams at once on one stalk. It will be more believable this way. First, roll a ball from plasticine of the desired color. Give the workpiece a slightly elongated shape, make a small depression for the petiole and a groove. Fashion a double petiole and attach the prepared 2 creams to it. You can lightly brown the side of the plum or make them purple, it all depends on your imagination.
Let's make a pear
It is more difficult to sculpt a pear for a child. This is not a round apple or a slightly elongated plum. It’s good if there is a real pear in front of the child’s eyes. Show your child that the top of the pear is much thinner than the bottom. Ask your child to roll the plasticine into a ball, and then carefully pull the shape up. Show how to use your fingers to create the desired shape. Please note that not all children succeed immediately. Cheer up the children, help those who are not doing well.
Make a leaf and a petiole for the pear. Fasten them together and give the resulting pear a blush using plasticine of a different color. You can make berries. At this age, the child is already able to give them different shapes: make a cherry round, a plum oblong. And if one end of the plum is slightly narrowed and a hexagon cut out of green paper is attached to the other with a twig, you will get a strawberry.
Using the same principle, kids can sculpt cherries, oranges, lemons and other fruits. Be sure to put the resulting crafts on display. Even if the children disassemble their crafts later, let their plasticine fruits show off a little. Believe me, it is very important for children how adults treat their creativity. Let the kids enjoy working with plasticine. Good luck with your modeling lessons!
Does your baby like apples or carrots? Invite him to make these delicious fruits and vegetables. Maybe he likes bananas or cherries? You can also make them from plasticine.
You will need:
- medium hard plasticine: yellow, black, blue, white, green and red
- wooden toothpick
- knife shaped stack
- base for modeling
- glass of water
- damp cloth.
Carrot
1. Make an elongated drop from a piece of orange plasticine. This is a carrot. 2. Make several cakes based on elongated drops of green plasticine. These are carrot leaves. 3. Use a stack to make a small hole at the thick end of the orange blob. 4. Connect the sharp ends of the green cakes and roll them a little with your fingertips. 5. Insert the end of the leaf tail into the hole at the top of the carrot and lightly crimp it with your fingertips.
6. Use a stack to make short horizontal stripes on the carrot.
Apple
1. Roll a large ball of red plasticine. 2. From brown plasticine, mold a sausage and a small cake of any shape. 3. Make a leaf-cake from green plasticine based on a drop. 4. Take a ball of red plasticine with two fingers and lightly press them onto the workpiece. Let one of the dents be the top and the other the bottom of the apple. 5. In the middle of the dent at the top, make a small hole with a toothpick and insert the end of a brown sausage into it. 6. Attach a green leaf to the second end of the sausage.
7. Place a small brown piece of cake in the middle of the bottom dent.
Cherries
1. Make three balls from red plasticine. Flatten them a little on the sides and make indentations at the top with the side of your finger. These are cherries. 2. Make three thin sausages from brown plasticine. These are cherry branches. 3. From green plasticine, mold a leaf-cake based on a drop.
4. Use a toothpick to make small holes in the center of the dents on the cherries and insert the ends of the twigs into them. Crimp the plasticine slightly around the insert. 5. Connect the free ends of the branches, press them together and secure the leaf.
Bananas
1. Make a sausage from yellow plasticine and cut it into 4-5 equal parts. 2. Shape each piece into a barrel, one end of which is sharper than the other, and bend the resulting pieces slightly. 3. Make small ball-based cakes from brown plasticine. Their number should be equal to the number of pieces of yellow sausage. Make another larger brown cake.
But also fruits
, which are also worth learning how to sculpt from plasticine. Two parallel modeling classes will help children quickly navigate and distinguish vegetables from fruits. Of course, the list of such fruits is inexhaustible, so we will learn how to sculpt only a few (the most popular options).
Modeling fruits
you can coincide with the harvest festival, if we are talking about rural areas, with the autumn school exhibition of crafts. This could be a standard labor lesson in elementary school or a training session in kindergarten. Even the youngest children can easily find objects to copy among the fruits, choose the appropriate color of plasticine from the box and create a craft, remembering what the object looks like.
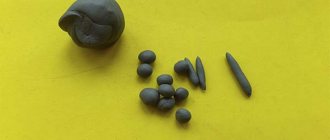
In this sculpting lesson we will learn how to sculpt an apple, pear, plum, orange and grape. And then all that remains is to feed your dolls with foods rich in vitamins. For work you will only need blocks of plasticine and stack (photo 1).
How to make an apple from plasticine
To sculpt an appetizing apple, choose green (dark or light), yellow or red. Green may also be needed to form a leaf (photo 2).
The shape of an apple is a ball. Roll it out of red plasticine or another color. To make the fruit more colorful, you can add green or yellow barrels. In this case, prepare a small piece of green plasticine (photo 3).
Make a cake from green plasticine and attach it to the red fruit (photo 4).
Crush the green plasticine with your fingers, smoothing the surface of the ball. Roll the dough again in your hands to get a unique fruit (photo 5).
Make a hole (recess) on one side with the tip of the stack (photo 6).
Insert a brown stalk into the hole and attach a green leaf to make it clear that this is a ripe and appetizing apple (photo 7).
How to make a pear from plasticine
When sculpting a pear, we will not stop at one color, but will mix several suitable shades at once: red, yellow, orange, green and their various shades. Prepare several suitable pieces (photo 8).
Pull all the pieces into sausages (photo 9).
Intertwine and mix the sausages together to get an unusual multi-colored mass (photo 10).
Create a pear by shaping the soft mass into the correct shape, like a light bulb (Photo 11).
Also add a cutting and a leaf, after making a recess (photo 12).
How to make plums from plasticine
To sculpt plums, you can use lilac, purple, blue, green, yellow and other colors of plasticine. Choose any of them and knead (photo 13).
Make several small balls (photo 14).
Draw out the balls into oval pieces. Using a stack or toothpick, apply a longitudinal stripe to each fruit. Prepare very thin gray threads as cuttings (Photo 15).
Make several plums (photo 16). Cherry plums are also made in the same way, only the shape of the parts is better left round, apricots - to make them you will need orange plasticine.
How to make an orange from plasticine
Modeling an orange will not cause any difficulties for anyone. Initially, you should roll an orange ball (photo 17).
Place a small brown dot on the ball. Using a stack or toothpick, start making holes all over the surface of the ball (Photo 18).
Smear the entire surface to obtain a fruit with a thick, rough skin (Photo 19). The same method can be used to make tangerines, only the balls will have to be flattened a little during sculpting.
Progress of the lesson
Read N. Nishcheva’s poem to the children:
Let's go to the garden and collect the harvest. We will grow carrots and dig up potatoes. We will cut a head of cabbage, round, juicy, very tasty, and pick a little sorrel. And let's go back along the path.
Ask the children: “What vegetables did we come across in this poem? (Carrots, potatoes, cabbage, sorrel.)
What other vegetables do you know? (Children's answers.)
Invite children to look at replicas of eggplant, peppers, beets, turnips, onions and other vegetables. Pay attention to their shape and color.
After this, each child chooses the vegetables that he will sculpt, independently selects the color of the plasticine and sculpts the vegetables of the desired size.
A child can fashion 2-3 vegetables and then put them in a molded plate.
To make a plate, roll out a large ball, flatten it into a disk, press in the middle, pull it back with your fingers and trim the edges.
Complex modeling classes in the middle group “Vitamins in the basket”
- March 19, 2017
International and All-Russian competitions
All-Russian competition of pedagogical excellence “Methodological piggy bank of a kindergarten teacher”
Goals:
- Continue to teach children, making circular movements with their palms, to sculpt spherical vitamins from plasticine.
- Introduce children to the concept of “vitamins”, formulate in them an idea of the need for vitamins in the human body. Strengthen children's knowledge about fruits and their benefits.
- To instill in children the need to eat properly, to cultivate a sense of empathy, and a desire to help.
- To develop children's interest in modeling.
Objectives : Continue to introduce children to plasticine and its properties. Continue to develop knowledge about primary colors. Teach children how to model fruits and vegetables using familiar modeling techniques; develop gross and fine motor skills, eye. Learn to press the plasticine ball with your index finger, attaching it to the base, and place the balls at an equal distance from each other.
Cultivate accuracy in work
Promote speech activation.
Strengthen your knowledge of the medical profession.
Preliminary work : looking at pictures and illustrations on the topic “ vitamins-Fruits ”, didactic game “Wonderful Bag”, “Guess what’s missing?”, guessing riddles about fruits and vegetables. Reading poems about the benefits of fruits and vegetables. SRI "Doctor". Conversation with children about a healthy lifestyle.
Vocabulary work : vitamins, medicine, vegetables, fruits.
Technology : health-saving, gaming.
Handout : pieces of multi-colored plasticine (red, yellow, green, plasticine board, stacks, napkins according to the number of children, plates.
Demonstration material : pictures of fruits and vegetables, images of vitamins in jars, a picture of food. doll Doctor Aibolit, phone. Small basket for a bunny.
Equipment: CD radio.
INTEGRATION OF EDUCATIONAL AREAS: productive, gaming, communicative, cognitive and research.
Surprise moments: basket with treats for children (cut fruits).
Progress of the lesson:
Introductory conversation.
Children sit on chairs. Dear Guys! I am very glad to see you all so healthy and beautiful today. And in what mood did you come to kindergarten today (children’s answers).
A knock is heard on the door. The teacher opens the door, and there is a bunny there and greets the children.
Educator: Look how sad he is. What happened?
Bunny: Hello, guys! My friends in the forest are sick, they don't have enough vitamins . I want to help them, but I don’t know what vitamins are and where they are . And so (sadly) my cart is empty .
- Yes, a sad story. Guys, do you think we can help cure the animals in the forest?
Children: YES!
Educator: Zainka, the guys and I will help you. What needs to be done to prevent animals from getting sick in the forest (children’s answers)
I should probably take some vitamins. Not only oranges, tangerines, But also carrots, beets and cabbage, Then we won’t be so sad. To grow up healthy and beautiful! We must make friends with vitamins. There are a lot of them - a whole alphabet? And each vitamin has its own sound. “A” - serves to make our eyes shine, “B” - our nerves will be strong, “C” - good for teeth and bones. You can even treat guests to it.
I know what can help us heal the little animals faster is vitamins!
Who do you think should be called for advice? What vitamins should you take (children-doctors)
That's right, Doctors.
Let's call the doctor on the phone. (a doctor doll comes in with a basket and says hello.
The Doctor doll explains to children that they need to give vitamins.
Doll Doctor: Who knows what vitamins are (children's answers).
— Vitamins help children and adults to be strong and healthy. Some vitamins help children grow, others help the eyes see well, others help the head think well and be smart. And there are vitamins that protect us from diseases.
—Where do vitamins live? (children's answers) in food products. (Attach a picture of products to the board).
— To be healthy, smart, strong, a person must receive vitamins from food. If a child does not receive enough of these vitamins, he begins to get sick often, loses his appetite and grows poorly. What do you think, at what time of year do we get the most vitamins? (children's answers) in summer and autumn. Why? (children's answers). Because at this time there are a lot of fruits and vegetables.
— And at other times of the year, so that people do not lack vitamins, vitamin tablets are sold in pharmacies. (showing a picture - vitamins in a jar).
— Vegetables and fruits are especially rich in vitamins. (attach a picture with vegetables and fruits to the board).
Name vegetables and fruits that you know and love. (children's answers).
Educator: guys, what is this, listen? (makes a riddle)
It’s the size of a fist, a red barrel, you touch it smoothly, but you bite it sweetly (an apple).
The red maiden sits in the dungeon and the braid is on the street (carrot).
These strong guys are hiding in the leaves in the garden bed. Twin couch potatoes turn green. (cucumbers)
In the summer, not afraid of the heat, the red balls ripened. They have matured as if by choice. What kind of vegetable? (Tomato)
Yellow citrus fruit grows in sunny countries. And it tastes sour. What's his name? (Lemon)
This fruit in a bright shirt loves it to be hot. Does not grow among aspens Round red. (orange).
Guys, apple, lemon, orange are fruits. And cucumbers, tomatoes, carrots are vegetables. And all these fruits and vegetables contain vitamins. Vitamins, bunny, are substances that help children grow and be healthy. Fruits and vegetables contain a lot of vitamins because they grow on trees and in garden beds. The sun warms them, the rain waters them and fills them with vitamins.
I propose to send a package to the animals in the forest - a vitamin basket with vegetables and fruits, which we will make ourselves. Let's guys help the bunny and his friends.
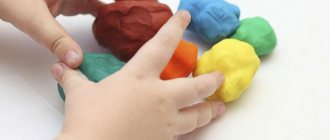
1. Preparing plasticine for work (warm it up in your hands)
2. Determine the size of the vegetable or fruit to be produced
3. Divide the plasticine into parts using a stack
4. Modeling of vegetables and fruits (children’s choice, using different modeling .
Independent work of children. (after work).
— And of course, physical education helps our guys stay healthy, agile and strong.
Physical exercise: “Fruit”
We went to the garden with friends (children are walking)
They found a lot of fruit there (hands on the belt, bending over).
We picked plums and pears (raise the right hand up, then the left)
We found all the apples (arms spread to the sides).
Come over, don’t be shy (they wave with their right hand, “they’re calling”, then with their left)
Help yourself to fruit, everyone (the left hand at chest level is turned palm up, the right hand “treats” everyone with fruit).
Well done, everyone was treated to fruits and vitamins. Well, Bunny, you remember where the vitamins are.
Bunny: Yes, I understand everything, itamins are found in fruits and vegetables. Just how can I cure my friends because my basket is empty.
Guys, let's put fruits and vegetables in a basket, let the bunny take them to the forest and treat his friends.
If animals consume vitamin products, they will definitely recover quickly.
— Do our guys like to eat vegetables and fruits?
— They love it very much and recommend it to everyone:
Reading poetry.
1 child.
Remember the simple truth - Only those who chew raw carrots or drink carrot juice see better.
2 child.
Oranges help against colds and sore throats. Well, it’s better to eat lemon, even though it is very sour.
Together
We never lose heart and have a smile on our face, Because we take ABC vitamins.
Bunny: Thank you guys for the fruits and vegetables. Now I know that they are very useful because they contain itamins . And while you were sculpting for me, I picked real fruits for you in the garden. Help yourself, kids, to some fragrant vitamins.
The children thank the bunny and say goodbye to him.
We exhibit our works at the stand.
Progress of the lesson
Give the children riddles: Round, ruddy, I grow on a branch: Adults and little children love me. (Apple)
Balls hang on the branches, Turned blue from the heat. (Plums)
A hurricane hit the island, the last one remained on the palm tree... (Banana)
Examine with your children models of fruits that are complex in shape: banana, pear, peach, apricot, etc. Pay attention to their shape and color.
After this, each child chooses the fruits that he will sculpt, independently selects the colors and sculpts the fruits in the appropriate sizes.
The child then places the sculpted fruits in a vase. To make a vase, roll a large ball, then press a hole on one side with your thumb, make a depression with your fingers and compare the edges.
Separately, make a stand for the vase - roll it into a ball and flatten it into a cake.
VIDEO lesson - How to make Vegetables from plasticine
Vegetables from plasticine updated: April 30, 2020 by i7allia
Today let's make bright and beautiful vegetables from plasticine!
The theme of the gifts of nature and the harvest is one of the most favorite children's themes. Kids will have a lot of fun making cabbage, carrots, peas, broccoli, corn and pumpkin! We start each lesson by showing the children what a particular vegetable looks like in the picture.
How to make vegetables from plasticine? We'll start by making cabbage. Roll out a round ball from bright green plasticine. Then we cover the ball with flat cakes. The flatbreads are very easy to make. Roll into small balls and flatten them firmly between your fingers. We try to make the edges of the cakes a little wavy.
How to make cauliflower? Roll up a ball of yellow-white plasticine and make indentations in it. We wrap it with leaves around the edges. For cauliflower leaves we use different shades of green and yellow.
Let's start making carrots. We take orange plasticine and roll it into a “sausage”, applying a little more pressure on one side. We should end up with an elongated cone. Using a stack, we draw cuts on the cone. Decorate the carrots with greens and eyes.
When preparing each vegetable, we remember what can be prepared from it. Maybe a flavorful soup or a fresh salad?
To make the broccoli inflorescence look like a real one, roll up several light green stalks and the same number of dark green balls. We make pinholes in the balls. Glue a leg to each ball. We connect the legs with balls into a single “bouquet”. Complete the inflorescence with several yellow-green balls.
It's a little more difficult to make corn. We roll a sausage out of dark yellow plasticine and apply a checkered pattern onto it using a stack. Roll a small ball out of light yellow plasticine and press it into the top of the craft. From the same plasticine we make elongated leaves, which we use to wrap the bottom of the crafts. We try to bend the ends of the leaves naturally.
Probably the easiest way is to make a pumpkin from plasticine. Roll the pale orange plasticine into a ball. Let's make it a little flattened. Draw stripes on the sides in a stack. All that remains is to decorate the pumpkin with a green stalk and leaves.
Svetlana Ivanova
Summary of a modeling lesson in the middle group “Vegetables and Fruits”
Lesson summary for the middle group on the topic
“
Vegetables and Fruits ”
Modeling theme
: «
Vegetables and fruits
«
(middle group
)
Target :
Strengthen the ability to distinguish between vegetables and fruits
;
compose a story using reference pictures. Develop gross and fine motor skills. Foster a caring attitude towards nature. Develop memory, thinking, attention. Strengthen the ability to sculpt familiar round and oval objects, using previously learned techniques (pulling, smoothing, pinching)
.
Demo material:
Pictures with vegetables and fruits
(tomato, onion, apple, pear, plum, lemon, orange, natural
vegetables and fruits (or dummies)
(tomato, onion, apple, pear, plum, lemon, orange,
“wonderful bag”
.
Handout :
Envelopes with two pictures depicting a vegetable and a fruit
(tomato and apple, carrot and pear, orange and tomato, plum and cucumber, cut into 2 parts vertically, plasticine, board, stack, napkins.
Progress of the lesson
Read G. Sapgir’s poem to the children:
The owl is gray, the owl is old, And the eyes burn like headlights. The eagle owl - jump, the eagle owl - leap, and gave the little owl a flag. Little Owl is glad, glad - Two lanterns are burning.
Ask the children: “Who is this poem about? (About the owl.)
What do the eyes of an eagle owl look like? (Children's answers.)
Invite the children to look at a fir cone and think about how they can turn it into an eagle owl: place the cone with the sharp end down, sculpt large oval eyes, a nose, tassel ears from plasticine and attach them to the top of the cone. Place the paws in the form of balls at the bottom of the cone.
You can sculpt a stump from plasticine and attach an eagle owl to it.