How to draw a bullfinch with a pencil and paints.
If you think that drawing a bullfinch is an impossible task for you, then you should read this article to the end: here you will definitely find several options for creating a winter picture with the same red-breasted birds on the branches.
Since drawing is a simple and exciting activity, it will appeal to both adults, who were entrusted with preparing a festive New Year's poster, and children. The latter are especially interested in creating colorful drawings, which can then be framed and given to mother or grandmother.
How to draw a bullfinch with a pencil step by step for children and beginners?
- If you and your children have long ago made and hung on a tree feeders for birds that winter in our area, and in the spring you install birdhouses and titmouses, then sooner or later your child will ask to draw birds. After all, kids love to put everything they see around on paper.
- You will always have time to abandon this idea. First, try drawing with us! Don’t worry: you will definitely be able to surprise your child with your drawing abilities: this article contains the simplest ways to draw bullfinches.
- But this does not mean at all that the picture will ultimately look primitive. The main thing is to follow the instructions exactly and you will be able to capture the beautiful bird that can be seen so often in winter in our area.
When drawing bullfinches that are in the cold, we give them the shape of a lump
How to draw a bullfinch
Let's try to understand the intricacies of creating a beautiful New Year's drawing with birds, without first mastering basic painting lessons. We don't have time for this!
- Very soon, children will begin to show off their work at school, and your child will already be fully equipped: the result of creative activities in this article can be several original pictures or postcards at once; you will help your child master the initial skills of creating a simple drawing, thereby nurturing him in sense of beauty.
- You shouldn’t count on instant results: a good drawing will only work if the work is done in stages, and not in one sitting.
In order for the drawn bird to be recognizable, you need to place an image of a bullfinch in front of you and focus on it while drawing.
Tips for drawing bullfinches:
- When drawing bullfinches that are in the cold, we give them the shape of a lump. This way they will look more realistic.
- In order for the drawn bird to be recognizable, you need to place an image of a bullfinch in front of you and focus on it while drawing.
- In children's books, magazines, and postcards you can find various pictures of red-breasted birds. Taking our advice into account, you can easily transfer your favorite image of a bullfinch to paper, and you can show off the result of your efforts to your family or friends.
- On a sheet of paper, without pressing hard on the pencil, mark the boundaries of the drawing.
- In the place where we will draw the bird, draw a center line. Moving a little to the side, we add an oval, tilting it to the right. This will be the belly of the bird, which protrudes slightly at the bottom due to the fat layer.
Knowing the structure of a bird, drawing it correctly will not be difficult.
Video: New Year's card in watercolor. Bullfinches
- Knowing the structure of a particular bird, drawing it correctly will not be difficult.
- Now you need to fit the outline of the bullfinch’s body into the previously drawn oval. Give it the shape of a pear.
- We finish drawing the tail, focusing on the sample drawing.
- We outline the contours of the wings, head, beak, paws. Most often, bullfinches are depicted sitting on branches. Therefore, we outline a branch with several lines.
- We designate the eyes of the bullfinch. Draw feathers on the wings. If the bird is standing on a branch, then we finish drawing the legs. We get rid of additional lines using an eraser: we remove the oval and the center line. If you draw with a child, you can safely entrust this task to him.
- So that the bullfinch can be recognized from our picture, we will paint the bird: we will make the chest, neck and cheeks red, fill the wings, crown, beak, and back with black.
- In winter, we can often see bullfinches on tree branches, near hanging feeders. These birds do not leave our region, but only against the background of white snow their colorful plumage becomes noticeable.
How to draw a bullfinch
So, let’s add a beautiful New Year’s picture to the collection of drawings, following the step-by-step instructions. In the first stages we will use a simple pencil (remember that the initial lines are drawn without pressing the lead). Let's color the finished sketch with a pencil.
Step 1:
- Visually divide a sheet of paper into two equal halves with a horizontal line. After this, we will draw more lines, dividing the sheet with three vertical stripes.
- Draw three circles on the left half of the sheet. They will help us draw the general outline of the bullfinch. We will make the oval in the middle the largest.
Draw three circles
Step 2:
- On the small (upper) circle we mark the bird’s beak with a small triangle. Well, now it becomes clear what we are trying to portray!
- Let's move on to the bottom of the bird's outline. Here we need to draw a straight line and outline the paws with two strokes. Let's give our circles the shape of a bird's body: draw the preliminary contours of the body on top of the circles. Draw a short line for the tail.
Draw the beak and outline the paws
Step 3:
- Let's draw a line on the beak, dividing it into two halves. We denote the eye with a small circle.
- Let's draw the contours of the legs and tail. The main thing is to maintain proportions and not deviate too far from the preliminary contour.
Let's draw the contours of the legs and tail
Step 4:
- Everything is quite simple here. We outline the tail, limbs with a pencil and work out the beak in more detail, marking the plumage on the wings and head.
- We clarify the contour of the eye and remove the auxiliary lines.
Refining the contours
Drawing the plumage
Step 5:
- We can say with confidence that we completed the task. Let's add a few more details: draw the plumage and draw the paws with claws. Let's decorate the bullfinch, focusing on the proposed scheme for applying shadows.
Colored drawing of a bullfinch
Drawing a bullfinch, grade 2
Blackwing,
Redbreast
And in winter it will find shelter:
He is not afraid of colds -
With first snow
Right here!
Run out quickly
to look at the bullfinches. They arrived, they arrived, the flock was greeted by snowstorms! And Frost the Red Nose brought them rowan trees. Sweetened well. Late winter evening Bright scarlet clusters.
The bullfinch looks smart - he is always in red. In fact, redbreasts are male bullfinch; females look much more modest. Their breasts are greenish-gray.
Bullfinches are sedentary birds; they are common in Europe and Asia. Gardens, parks, forests, undergrowth, lowland areas, mountain forests, forest-steppe zones, coniferous forests and mixed forests - wherever the bullfinch lives.
The bird especially likes forest areas, because it is in the forest that it breeds its chicks.
The bullfinch is approximately the same size as a sparrow. The physique is dense. Nature has endowed the bullfinch with a thick, wide beak.
In autumn, bullfinches gather in small flocks and settle closer to people’s homes. Rowan and other berries left over from the generous autumn are the main food of bullfinches in winter. In winter they wander through parks, gardens, groves and squares in the hope of getting food for themselves.
And in the summer it’s paradise. Arachnids, insects, plant food are the diet of these birds.
The month of May is good, and it is in May that the female lays eggs. On average five pieces. The female incubates the light blue spotted eggs for two weeks. At this time, the future father is “on duty” at the nest and feeds the female.
Then the hatched chicks do not leave the nest for another two to three weeks.
Both parents are involved in upbringing, but the male takes more care of the younger generation.
.
“
What are you thinking about, bullfinch?” Author: And Belyakov
Oh, how angry the frost is!
There is snow all around, snowball... The bullfinch is sitting on a branch, The bullfinch is blazing and burning, Like a small flag. And the garden, And the grove, and the wasteland... Everything is in a quiet winter sleep. - What are you thinking about, bullfinch? - Of course, about spring!
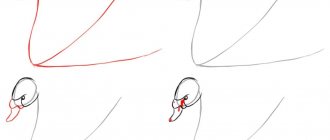
Draw the head in the form of an oval as well. Only it should be smaller and located horizontally.
On the left side of the body, draw a wing. Its beginning can be depicted as an oval. The tip of the wing is in the form of several long feathers located nearby. Divide these two parts of the wing with a wavy line.
Connect the wing to the body of the bird with a wavy line.
Draw two triangles with sharp ends in mirror image. One figure is longer, the other is shorter.
Erase unnecessary lines with an eraser and divide the beak in half with a horizontal line.
Draw oval cheeks on the bird's head.
The bullfinch's head is black. The cheeks are different in color from the color of the head. Therefore, they do not need to be painted over. Don't forget to draw small round eyes. Look like in the picture.
Our bullfinch is sitting on a branch.
He sat down on a rowan branch. It is on this tree that it can most often be found in winter. Because he looks for the remaining fruits on the trees to eat. Rowan is the favorite delicacy of the bullfinch.
How to draw a bullfinch on a branch with a pencil and paints?
If you need to draw a New Year's poster, then you simply cannot do without an image of elegant red-breasted birds. By following our step-by-step instructions, you can surprise your friends with your artistic talent and creativity, and also teach your child how to work with paints.
Bullfinches on a branch
- Let's start drawing handsome feathered creatures with a bright red breast with a simple pencil. In order not to “pull the bullfinch by the tail,” we immediately outline the schematic location of the spruce branches on the leaf.
- Now let’s show with barely noticeable lines the contours of the snow stuck to the branches.
- Using an eraser, we remove the previously drawn lines inside the branches and mark with ovals the places where the birds will be located. We draw tubercles of snow under the initial contours of the birds. We finish drawing the contours of the cones. Draw the tips of the branches peeking out from under the snow
- Draw the head of the first bullfinch. Add a wing, which is in the field of view, and a beak. We draw the bullfinch’s convex abdomen and tail. Let's move on to the second bullfinch: draw in the same sequence: head, back, wing.
- We complete the missing details for the second bullfinch, focusing on the already drawn bird. Fill the outline of the head with black.
- Let's start drawing the third bullfinch. Again, first draw the head, then draw the outline of the back, draw the wing and beak. We work out the contours of the third bird in more detail. We draw a tail, a convex breast, and outline the second wing with a small curved line.
How to draw bullfinches on a branch
- Let's start decorating the picture: we paint the bird's breasts with orange-red color, fill the head, wings, and tails with black.
- Take a green pencil or felt-tip pen and use light dashed lines to mark the needles on the spruce branches. Fill the previously drawn contours of the cones with brown.
- Use the same brown color to highlight the outlines of the branches. We use a blue pencil to highlight the shadows on the hillocks of snow.
- We use a light green pencil to make the spruce branches thicker. Add shadows to the pine cones. Now you can make the spruce branches more realistic using a dark green pencil; let’s go over the needles again, drawing new strokes a little longer. Let's add a red tint to the cones, and highlight the shaded areas in the snow with purple.
- All that remains is to add a background and write a beautiful Happy New Year greeting.
Example No. 2
Using this master class you can draw two bullfinches sitting on a branch. To do this, use a pencil to draw two ovals located next to each other. Then you need to add small semi-ovals to them, from which you will get the heads of birds. Then you need to make them wings and a tail. After this, you should create all the small details. Since they are close, their faces should be facing each other. When the bullfinches are ready, you need to make a tree branch for them to sit on. To complete the work, you should paint the birds with paints: the breast - red, and the rest - black.
Drawings for sketching a bullfinch for children for kindergarten and primary school: photo
In the selection of pictures below you will find various options for drawing bullfinches.
How to draw a bullfinch in watercolor
Bullfinches can often be seen on old New Year's cards.
