Hello, readers of my blog!
Learning to draw beautiful patterns step by step is not at all difficult. Having mastered a simple step-by-step drawing method, you can apply it in many styles and areas of your creativity. Let's create some intricate designs together.
What is a pattern
How to learn to draw patterns? It's much simpler than it might seem at first glance.
Pattern is, first of all, repeating shapes.
African Design
Have you noticed that different cultures around the world have designs and patterns? The thing is that simple drawings formed the basis of cultures many centuries ago.
Japanese ornament
African, Japanese, Egyptian, Indian, Old Russian, Mayan patterns and many other ornaments contain the imprint of the culture of ancient peoples and their perception of life.
Indian ornament
Often, drawings on ancient temples, ceramics or manuscripts that have survived to this day can tell about the way of life of ancient peoples, their activities, pastimes, and beliefs.
Various options and techniques
Drawing different patterns will help you in a variety of creative fields. They can be done with paints or on paper with a pencil. Light patterns can be made with nail polish.
When you practice and draw a lot of drawings in a notebook, you will be free to draw from your head: only your imagination and creative thinking are important here.
Patterns serve as an integral element in various types of art: oil painting, drawing, illustration, batik - when people decorate scarves and other products with various designs.
Apart from textiles and artwork, they can also be found in architecture and all design related fields.
If the pattern is complex and consists of many elements, it is better to first outline it with a simple pencil.
Also check if it fits in your format. Very often during the drawing process you can get carried away and not calculate the right place.
A good exercise is to draw by cells in a notebook.
For beginners, this is an excellent method for mastering the basics of drawing. You will be surprised how many things you can draw using this method. You can draw a simple pigtail or a beautiful kitten in a matter of minutes.
For children, drawing in boxes or drawing simple patterns works very well.
These methods develop the child's concentration and fine motor skills. How can a child learn to draw? Start with simple drawings and you will be surprised how your child will get involved in this exciting process.
Choose an image that is primarily interesting to the child.
These could be animals, birds, flowers or cartoon characters. A squared notebook will help the creative process. It can be difficult for children to draw in a regular album without markings.
Ornament. Symbolism in ornament
Ornament.
The word comes from the Latin word
adornment
. Denotes a pattern that is based on repetition and alternation of the elements it consists of.
As a rule, the ornament
used to decorate various arts and crafts.
geometric ornament appeared in the history of mankind
.
Its main elements are
straight or wavy lines, circles, cells, crosses.
It is this kind of ornament that is found on clay vessels of primitive people, items made of stone, metal, wood and bone, which are found by archaeologists. For ancient man, these were not just icons; with their help, he could express his concept of the world. A straight horizontal line
meant earth
, a wavy
water,
a cross
meant fire,
a rhombus, circle
or
square
meant the sun.
For ancient people, ornaments always had a magical meaning.
Almost all peoples of the world had ornaments on their clothes on the sleeves, bottom and neck, and women wore an apron with an ornament. It was believed that in this way one could protect oneself from evil spirits.
The image of the sun occupies one of the main places in decorative and applied arts.
The sun in all sorts of forms can be found in different objects.
Straight equal-pointed cross
was also an image of the sun.
The rhombus
was a symbol of fertility and was often depicted together with the sun sign inscribed in it.
In addition to the geometric one, in the ornaments of Ancient Russia, one can often find various ancient pagan themes.
The female figure personified the goddess of the earth and fertility.
Images of birds and waterfowl not only decorated the product, but also served as amulets.
Thus, two birds that were embroidered on the ends of a wedding towel promised harmony between the future spouses. The bird symbol, embroidered close-up or as part of a complex composition, personified the image of a mother who protects her children, the image of a hardworking housewife.
Very often in ornaments you can find scenes of magical calendar rituals
, which are associated with basic agricultural work: sowing or harvesting.
All existing ornaments can be divided into several types
. This division is related to what exactly is depicted.
In the process of making clay products on a potter's wheel, a characteristic pattern appears. The same thing happens when fabric is spun or ropes are woven. This type of ornament is called technical.
The next type is a symbolic ornament.
Here, even the most complex concept can be expressed through simple symbols.
This type of ornament appeared in Ancient Egypt and other countries of the Ancient East
, but today it continues to play an important role.
Floral ornament.
This is the second most widespread ornament after the geometric one; it is characterized by its own motifs, and they differ from the country in which they are applied and from the time when they were made. With the help of floral patterns you can create a wide variety of subjects.
This type of ornament is characterized by numerous plant forms:
leaves, flowers, fruits, taken together or separately. In the hands of a master, the original shapes, scales, and colors change.
Often these changes are so significant that the original material is transformed beyond recognition.
The most common plants used for this species include:
acanthus, lotus, papyrus, palm trees, hops, laurel, grapevine, ivy, oak.
Calligraphic or epigraphic ornament.
It consists of individual letters or text elements.
The art of calligraphy most fully developed in China, Japan, Iran and a number of Arab countries, and was also used in Ancient Russia.
Fantastic ornament.
It is characterized by
images of non-existent, imaginary, often symbolic content. This type of ornament depicting scenes from the life of fabulous animals became especially widespread in the countries of the Ancient East.
There is also an ornament, the main elements of which are the image of the sky, sun, clouds, stars. It is called astral or stellar
(from the word “aster” - star).
Most common in Japan and China.
If various landscapes are used for the ornament, then we have a landscape ornament
.
Animal ornament.
An ornament that consists of images of birds and animals. Both similar to real ones and conditional ones.
Subject ornament.
Originated in ancient Rome and is still widely used today.
It is characterized by
images of military paraphernalia, household items, and attributes of musical and theatrical art.
Ornament played a very important role in Russian folk costume.
The main motifs were
signs - circles, crosses; images of a female figure - a symbol of fertility, mother - raw earth; wavy rhythmic lines – signs of water; horizontal straight lines that marked the ground; images of a tree are the personification of ever-living nature.
Embroidery on peasant clothes not only decorated them and delighted those around them with the beauty of the patterns, but was also supposed to protect the one who wore these clothes from harm, from an evil person.
If a woman embroidered a Christmas tree, it means she wished the person a prosperous and happy life, because a spruce is a tree of life and goodness. A child was born to a peasant woman. And she will decorate his first simple shirt with embroidery in the form of a straight line in a bright, joyful color. This is a straight and bright road that a child should follow. May this road be happy and joyful for him. As a rule, children's clothes were sewn from old things of their mother or father. It was believed that she retains protective parental power and this will protect the child from misfortunes and troubles, the evil eye and damage.
When the children grew up, they had their own clothes made. For girls, floral patterns were embroidered on a ponyova (women's woolen skirt). For boys, symbols of fire, the sun, images of animals, and bells were embroidered. The embroidery on children's clothing was always red.
Lesson summary.
We learned about ornament. This will help you decide what will decorate your product.
What's useful
Such drawing is useful not only for children, but also for adults. By drawing in your free time, you can improve your skills and develop your creativity.
The more varied your work is, the faster you will be able to master new drawing techniques.
The most important thing in the process is your imagination. Creativity is what will make you and your work stand out from others.
You can apply new abilities in life. You can keep your hobby as a hobby and create works when you have free time.
Or you can make them part of your profession.
- For example, mehendi is in very high demand. Many girls want to decorate their body with temporary ornaments in Indian style.
- You can also design cards or, say, wedding invitations.
- Why not use your new skills in interior design or business card design?
Drawing can be used in any creative field.
Even if your profession is not related to creativity, such drawing will help you develop new qualities in yourself. This is very valuable, as you will stand out among all employees due to creative thinking.
Training video:
LiveInternetLiveInternet
Quote from the message Born_Spring
Read in full In your quotation book or community!
LESSON No. 4. COURSE OF QUILT DRAWING ON FABRIC.
Our fourth lesson will be devoted to the ornament in a circle. The circular pattern is used in the creativity of all peoples, regardless of their religion and residence: it decorates temples, clothing, household utensils, jewelry, etc. (photo 1,2,3). photo 1
photo 2
photo 3
The basis of such an ornament is a circle, and this is a symbol of integrity, unity, continuity in the dialectics of human life. The circular pattern is also a sign of the sun and the full moon. Linen and clothes decorated with such an ornament protected against dark forces and protected the well-being of the home, because... the sun and the cycle of seasons gave man everything he needed for life. And what unimaginable circular patterns are found in living nature! Remember the structure of a flower, snowflakes, jellyfish, etc. (photos 4,5,6). photo 4
photo 5
photo 6
The main features of a circle pattern are repetition, rhythm and symmetry. The ornament in a circle has several names: mandala, fractal, rosette, circular ornament, kaleidoscope. The last name is most suitable for our case, because reflects the way we will create circular patterns. Thus, today we will talk about CX-KALEIDOSCOPE.
These two weeks, you and I will have to draw quite a lot, since before we transfer the CX kaleidoscope to fabric, we must accurately depict it on paper. You can draw such ornaments using a computer program, but let's try to do it on our own. I'm sure you'll enjoy creating circular compositions on paper. SH – I first saw the kaleidoscope version in Lyubov Gairunova’s album “SHMS Patterns”. (photo 7,8). The author is unknown to me. The work amazed me with its expressiveness and quality of execution. At first it seemed to me that it was completely beyond my power to create and reproduce such an ornament on fabric. But after carefully examining the work and analyzing the pattern, I realized that it was not so difficult... photo 7
photo 8
I offer you three ways to make CX kaleidoscopes.
I’ll say right away that I didn’t think of the sequence in creating rosettes that I will describe below right away. Through trial and error, I found, as it seems to me, the most rational ways to draw an ornament in a circle. I am sure that in the process of work you will definitely have some of your own ideas. FIRST METHOD
. A circular ornament usually consists of several rays, most often their number is even: 4,6,8,12, 24, etc. The pattern in the beam itself can be either symmetrical relative to the center of this beam or asymmetrical. In the first way, we will create a CX kaleidoscope of 8 beams with a symmetrical pattern in the beam (photo 9). photo 9
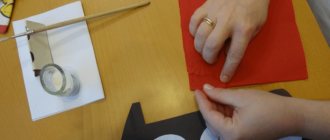
1. Take a square sheet of transparent paper (for example, tracing paper). The length of one side of the square is equal to the diameter of your future circle + 2 cm. 2. We bend this sheet several times, always in half (remember how you made snowflakes as a child). For an 8-beam symmetrical kaleidoscope, bend it this way 4 times (photo 10, 11, 12, 13). photo 10
photo 11
photo 12
photo 13
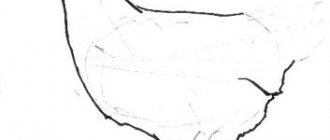
Then on the folds we make a mark according to the size of the radius of the future circle. We receive a segment of a circle (½ ray), on which we need to draw a pattern. 3. Draw a pattern on ½ of the beam. The drawing on one side must reach the height of the radius, and on the other it can be of any size, but not more than the height of the radius. Build it using any geometric shapes (triangles, rhombuses, squares, circles, ovals, etc.), in any order, without observing any symmetry, but connecting these shapes with each other. It is better to draw with a well-sharpened soft pencil, rather than with a ballpoint pen, as sometimes it is necessary to correct the drawing in the future. (photo 14, 15) photo 14 photo 15
4. We bend the paper in the center of our beam and redraw the created pattern on its other side. We get one symmetrical beam out of eight. (photo 16) photo 16
5. Further creation of a kaleidoscope is possible in two ways. OPTION A. Bend the paper on the side of the drawn ray and transfer the drawing, getting 2 rays - 1/4 part of the pattern (photo 17), bend it again and get 4 rays - ½ part of the pattern (photo 18); and bend and transfer the entire pattern for the last time (see photo 9). With this option, you need to very clearly bend the paper initially so that the segments are the same. photo 17
photo 18
OPTION B You take a second sheet of transparent paper identical to the first, bend it 3 times (you get 8 rays), straighten and translate your first drawing 8 times. Be sure to match the folds of the second sheet of paper with the side borders of your first sample. (photo 19) With this option it is easier to adjust the rays to each other, even if you make a slight mistake in the bends. photo 19
6. Your kaleidoscope sketch is ready. Now you must draw on it, taking into account the continuity of filling the pattern (after all, you will need to quilt it on the fabric in the future), add some simple microstitches here and there. You also need to separate the pattern by color (photo 20). Usually the color change occurs in circles: the center is one color of thread, then several rows of a different color, etc. You can do all this on the original drawing or on one of the rays. photo 20
7. Transfer the design to the fabric using a stitch on tracing paper. I advise you to sew on tracing paper only the most basic large details and immediately with a thread of the color that you will then use to quilt this part of the circular ornament. (photo 21) photo 21
8. Tear off the paper and finalize your drawing, decorating it with small details, CX-zigzag, seals and microstitches (remember how we created zentangles). Try to stitch the CX zigzag, always heading towards the center or away from the center of the circle, then the line will look symmetrical. (photo 22) photo 22 It was in this way that I completed my first work using the CX-KALEIDOSCOPE technique. The panel is called “Shine, Shine My Star.” The pattern has a radius of 25 cm. The size of the panel is 55 x 70 cm. (photo 23, 24) photo 23
photo 24
SECOND METHOD.
In the second way, we will create a 6-ray kaleidoscope with an asymmetrical pattern in the beam (photo 25). photo 25
In my opinion, this drawing looks more dynamic and natural. 1. Again, take a square of transparent paper, the side of which is equal to the diameter of the future of your CX kaleidoscope + 2-3 cm. We bend it twice, we get a small square and fold it into three folds, that is, we get a segment with a central angle of 30 degrees (photo 26) . We straighten our square and after one fold at the height of the radius we put a mark - this will be the vertices of our 6 rays (photo 27). photo 26
photo 27
2. We bend the square again along the previous folds, leaving one beam completely open. We make a drawing on the beam (I drew large figures from wavy lines to fill them later with a cover stitch). (photo 28) photo 28
3. Next, the creation of a kaleidoscope follows any of the above options (see the first method). With option A we get a mirror image (photo 29); with option B there is a sequential repetition of the same pattern (see photo 25). photo 29
4. Again, we clarify the final drawing, decide on the details (draw them on one of the rays), and the color. 5. Next we proceed similarly to the first method, steps 7,8 (photo 30) photo 30
Using the second method, I stitched a fantasy flower in my favorite Art Nouveau style “Flower of My Fantasy” (photo 31, 32) Quilt size 33 x 33 cm, pattern radius 16 cm. photo 31
photo 32
THIRD METHOD.
In the third way, I suggest you create a pattern to which the concept of “rosette” is most suitable. This pattern will consist of several circles with one center and it will be filled with our favorite ribbon stitch (photo 33). photo 33
1. To begin with, from the center of our square, using a compass, we will draw several circles with different radii. The circle with the largest radius will be the border of our pattern. (photo 34) Choose the distance between the circles arbitrarily, alternating narrower and wider ribbons. photo 34
2. We fold the square 4 times (as in the first method) and thus we get 16 rays of the CX kaleidoscope (photo 35). Select one of the beams and draw a pattern on it using ribbon stitch patterns you know. I recommend that you alternate stitches according to the density and complexity of the pattern, and add extra dense inclusions. The outermost row can be shaped like a flower petal or just a triangle with the tip at the extreme point of your beam. It would be good if, when drawing, you looked for some guidelines for the location of the patterns relative to each other (photo 36). photo 35
photo 36
3. We transfer this created drawing to a previously prepared draft, also folded 4 times (photo 37 - there are drawings of three rosettes on the draft) photo 37
4. We transfer the drawing from the draft to the final copy (the first square), sequentially filling in the rays of your kaleidoscope and making sure that the guide lines (that is, the circles you previously drew) coincide (photo 38). photo 38
5. We decide on small details and color transitions. 6. We transfer the design onto the fabric using a stitch on tracing paper, immediately using the colors of the threads that will later fill the design. Try to transfer only the largest and most important parts of the pattern for symmetry (small stitches, such as stippling, pebbles, bindweed, straight short lines, mesh, etc. do not need preliminary transfer from tracing paper to fabric). (photo 39 – blank for transferring to fabric) photo 39
7. Carefully tear off the paper and add small details to the pattern. Using the third method, I made a mini-quilt for the project “My flower is a gift for you,” which is carried out in the Patchwork community. The dimensions of the panel are 21 x 29 cm (format A 4). The radii of the flowers are 7, 9 and 12 cm. (photo 40, 41,42) The peculiarity of this work is that CX kaleidoscopes are combined here with the shadow trapunto technique (photo 43) photo 40
photo 41
photo 42
photo 43
I really liked this method of making circular ornaments using SHMS, as well as the first two.
I am absolutely sure that I will have more than one work using the “CX-kaleidoscope” drawing method. By the way, in your works you can not draw the entire circle, but only some part of it (half a circle, a quarter of a circle, etc.), as I did in the last panel. The peculiarity of this lesson lies in one paradox: how simple and interesting it is to create these patterns, it is just as difficult and tedious to explain how to do it. For the first time, I really regretted that I didn’t have a video camera to show you all this with my own eyes. If something is unclear, write, I will try to explain in more detail. HOMEWORK.
1.In today's homework, you will have to draw a lot. I advise you to draw 2-3 samples in each method and send me those drawings that you do not yet have time to turn into stitches. 2. Make one piece of work (panel, pillow, bag, cover for a photo album, etc.) using the CX-kaleidoscope technique. I would like our graduate students to take part in the project “My flower is a gift for you.” If you have the same desire, you can “draw” your flowers using any of the above methods. Good luck in improving your artistic quilting skills!!! Just be patient, there’s only one thing left before you graduate from graduate school, a fairly simple one. In the meantime: NOT A DAY WITHOUT A LINE!!!
https://blogs.mail.ru/mail/buba-lu/5AFCCB6A729A13FB.html